Showing posts with label #Kaylee Snell. Show all posts

Saturday, 1 January 2022

Merry Christmas Cards


Welcome again!   This time using Couture Creation's new Christmas collection 'Deck the Halls'.

 This is an A6 size card and it can be complemented also with the lovely printed envelopes that have also been released.  

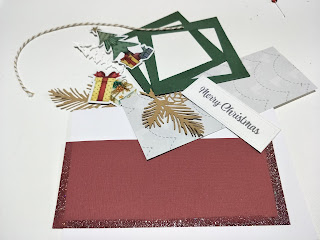
I made 2 cards using the one paper pad sheet with complementing coloured cardstock.  I used the envelope as a guide to chose the ephemera pieces for the cards.  I started by cutting a piece of copy paper slightly smaller than the coloured cardstock matting and laid it on top.  I then embossed the edges of the coloured cardstock with glitter embossing powder.  Once all the die cutting was done, I assembled the cards adding a few trimmings to the arrangement and glued it all together.  I popped foam tape under the focal pieces.  There is just so many lovely ephemera pieces in this collection that we are spoilt for choice.


CO723893    Envelope - White A6
ULT200031   Cardstock - Cypress Pine
ULT200044   Cardstock - Cinnamon
ULT200068   Cardstock - Carnelian
CO726219    Mirror Board - Silver Damask
CO727181    Photographic Alpine White Smooth
CO728532    Tall Nesting Die set - Happy Holidays (Branch)
CO728552    Die Cut Shapes - Winter Wishes - Wreath
CO728562    6x6 Paper Pack - Spirit Melodies - Sentiment
CO728564    6x6 Paper Pack - Winter Dazzle
CO728563    Die Cut Emphemera - Christmas Tree & Presents
CO728568    Mini Die - Pine Branch
CO728570    Mini Die - Rustic Christmas Tree
CO728546    Christmas Envelopes
CO728278    Embossing Ink Pad
CO725016    Embossing Powder - Mixes - Irridescent Superfine Glitter
CO728511    Glue - All Purpose Art Glue
CO726770    Nesting Square Set (Retired)


Other Products:-
Red Thin Ribbon, Red Beads, Bakers Twine, Adhesive Gems and foam tape.


Thanks for stopping by ...


You can see me over on my personal blog here:-


 Christmas Card & Envelope


Welcome again!   This time using Couture Creation's new Christmas collection 'Deck the Halls'.

 This is an A6 size card and it can be complemented also with the lovely printed envelopes that have also been released. I used the envelope as a guide to choose the ephemera pieces for this card.   

I stamped the wreath onto photographic paper and coloured it with the dye inks and a water brush, then fussy cut it out into 2 pieces to form an oval wreath.   I created the silver frame by die-cutting 2 different sized rectangle dies together at the same time.  I used a polka dot embossing folder for the backing mat, as to me it resembled snow.  Once all the die cutting was done, I assembled the card.  Foam tape was added behind the focal pieces and the frame.  There is so many lovely ephemera pieces in this collection. 


Couture Creations Products:-

CO723893    Envelope - White A6
ULT200019   Cardstock - Ice Crystal
ULT200031   Cardstock - Cypress Pine
ULT200032   Cardstock - Shamrock
ULT200040   Cardstock - Chocolate
ULT200068   Cardstock - Carnelian
CO727166    Glitter Card - Silver
CO727181    Photographic Alpine White Smooth
CO728505    Outline Stamp - Merry Wreath
CO728532    Tall Nesting Die set - Happy Holidays (Branch & Tree)
CO728550    Die Cut Shapes - Christmas Joy - Sentiment
CO728563    Die Cut Ephemera - Christmas Tree & Presents
CO728568    Mini Die - Pine Branch
CO728570    Mini Die - Rustic Christmas Tree
CO728542    Christmas Envelopes
CO728511    Glue - All Purpose Art Glue
CO726770    Nesting Square Set (Retired)
CO728387    Water Brush
CDEIPU021 Dye Ink - Grass Green
CDEIPU024 Dye Ink - Olive Green
CDEIPU026 Dye Ink - Pine Green
CDEIPU036 Dye Ink - Dark Grey

Other Products:-
Embossing folder and foam tape.


Thanks for stopping by ...


You can see me over on my personal blog here:-


 Peace, Love & Joy  Gift Tag Cards


Welcome again!   This time using Couture Creation's new Christmas collection 'Deck the Halls'.

I wanted to incorporate a gift card to a Christmas card so I created this Pocket Card.  This is an A6 size card and it can be complemented also with the lovely printed envelopes that have also been released.  

I made 2 cards because I cut 2 sheets in half from the paper pad and created an alternative version of the 2 papers.  I measured a gift card and made a tag and pocket to fit it onto the front.  Just to be a little bit different, I rounded the corners on each paper piece on one card.  I added a few trimmings to the arrangement and glued it all together.  On the snowman card I added a thin film of texture paste to resemble snow.   Another a gift with a gift. Cute. 


CO723893    Envelope - White A6
ULT200044   Cardstock - Cinnamon
CO727181    Photographic Alpine White Smooth
CO728532    Tall Nesting Die set - Happy Holidays (Branch)
CO728562    6x6 Paper Pack - Spirit Melodies
CO728563    Diecut Emphemera - Snowman
CO728568    Mini Die - Pine Branch
CO728543 - 7 Christmas Envelopes
CO725349    Corner Punch - Large
CO728511    Glue - All Purpose Art Glue


Other Products:-
Bakers Twine, Ribbon, Sequences, Gift Card & Texture Paste.


Thanks for stopping by ...


You can see me over on my personal blog here:-


Tuesday, 23 November 2021

Gift Tag Slider Christmas Card

Merry Christmas Gift Tag Slider Card


Welcome again! Still loving the 'glitter'.  This time using the Christmas Joy Die cut glitter framed shapes.  These elements are from Couture Creation's new collection 'Deck the Halls'.  

I wanted to incorporate a gift card to a Christmas card so I created this Slider Card.  It was a simple process of creating the slider.  This is an A6 size card and the measurements for the slide mechanism are detailed in a photo above.  To get these figures I measured the 'Deer focal piece' to get the width of the slider and also the length of a gift card to get the the length of the tag/slider.  The stamp 'Merry Christmas' had to fit into the opening as well.  To cut the front fold area into the card front, I found a rectangle die that would fit my slider and partial cut the 3 sides.  I scored a fold line along the 4th side of the cut, then allowed 1cm as a front band then divided the remainder and scored a fold line in the middle.  I attached the 'Deer' to the front of the fold.

I pulled the slide up then aligned the card front to the card base, penciled in an outline of the area available to do the stamping on.   I embossed the stamped sentiment in this area with silver embossing powder and coloured the letters with blue alcohol ink.  I then sprayed over this area with a glitter shimmer spray.  Because the 'Deer' die cut had a glittered edge, I decided to add a similar effect to the card front panel by going around the edge with an embossing pad, sprinkled glitter embossing powder on it and heat set it.  I glued the ribbon to the front, then added the double-sided tape as shown in a photo above.  Before I could attach it to the card front, I had to glue/tape the tag base to the front band.  The tag has to hold gift card so it needs to be able to slide easily but not loose.  

Once all that was in place, I just added the final trimmings

  I quite enjoyed learning how to make this type of card and I think it turned out very pretty and sparkly.  It was a gift with a gift.  

You could compliment this card with one of the lovely printed envelopes that have been released with this collection.


CO724990    Embossing Powder - Sparkles Silver/Silver
CO727166    Glitter Card - Silver
CO727177    Glitter Card - White
CO727181    Photographic Alpine White Smooth
CO728530    Outline Stamp - Merry Christmas
CO728532    Nesting Die - Happy Holidays Tall Card (Branch)
CO728564    6x6 Paper Pack - Winter Dazzle
CO728570    Mini Die - Rustic Christmas Tree
CO728549    Die Cut Shapes - Snowy World
COAP9421   Alcohol Marker - Powder Blue


Other Products:-
Silver Ribbon, Crystal Ribbon, Silver bells, Silver decorative trim, Gift Card, Glue & Double-sided tape.


Thanks for stopping by ...


You can see me over on my personal blog here:-


Monday, 9 August 2021

Princess Card

 Princess Card


Welcome again! I wanted to use some glitter elements in this card as this stamp is of a pretty girl and what girl doesn't like a bit of glitter.  The beautiful glitter inks and glitter card were perfect.  These stamps and dies are from the new collection You Go Girl designed by Lucy Campeanu.

I splashed some of the pink tone alcohol inks and the blending solution onto a piece of white card, then once dry I die-cut the flowers from it and shaped the flowers a little.  The 'Princess' sentiment was cut from the pink glitter card as well as some foam.  The floral die and a leaf die was cut from white cardbase.  I stamped the sitting girl with the Stayz matte black ink onto the photographic white card and coloured them with the alcohol markers.   These markers are so juicy and they have a smooth flow of colour that blends effortlessly - for a beginner in colouring every little bit helps.

I trimmed the pink glitter card to the size just a bit smaller than the cardbase, glued cardboard to it and then adhered it to the cardbase.  I trimmed a piece of photographic paper to a size just smaller than the pink glitter card.  On this piece I swooshed the green alcohol inks and the blending solution then allowed it to dry before glueing it onto the pink glitter card.  The 'Princess' dies of the foam and the glitter card were glued together.  With some of the flowers I glued a few stamens to the centres, others I added a resin bubble. Once all the pieces were prepared, it was just a matter of mounting and gluing/layering them into place.  Glitter glue and resin bubbles where added randomly to finish the project. 


Couture Creations Products used:-


CO723893     A6 White Card
CO727168     Glitter Card - Pink
CO727181     Photographic Alpine White Smooth card 
CO728366     Stamp set - You Go Girl - Sitting Pretty
CO728375     Die - You Go Girl - Floral Corner
CO728378     Die - You Go Girl - Princess
CO728095     Stayz Alcohol Ink - Matte Jet Black
CO727958     Alcohol Ink - Fluro Green
CO727671     Alcohol Ink - Verdant Glitter Accent
CO727305     Alcohol Ink - Coral
CO727325     Alcohol Ink - Rasberry
CO727328     Alcohol Ink - Salmon
CO727337     Alcohol Ink Blending Solution
COA134         Alcohol Marker - Middle Yellow
COAP155      Alcohol Marker - Light Skin Color
COAP489      Alcohol Marker - Skin Color
COAP656      Alcohol Marker - Jasper
COAP917      Alcohol Marker - Baby Yellow
COAP921      Alcohol Marker - Crape Myrtle
COAP2065    Alcohol Marker - Wisteria
COAP2288    Alcohol Marker - Tender Pear
COAP5305    Alcohol Marker - Greek White
COAP7502    Alcohol Marker - Khaki Grey
COAP9544    Alcohol Marker - Leaf White
CO728096     Clear Casting Resin
CO726327     Glue - White Tacky
CO724824     GoCut and Emboss die cutting machine
CO727381     Precision Stamp Press


Other Products:-
Stamens.


Thanks for stopping by ...


You can see me over on my personal blog here:-


Tuesday, 13 July 2021

Celebrate Layout


Celebrate Layout


Welcome!  I’ve gathered together some of the awesome dies, stamps and ephemera pieces in Lucy Campeanu's You Go Girl collection to create this pretty coloured layout.  This particular stamp is called 'Sitting Pretty' and I just had the perfect photo of my darling little grand-daughter Olivia, for this layout.

I fussy-cut the flowers from the ephemera pack and die-cut a few of the floral die.  The banner dies and the sentiment were stamped with the stayz burgundy ink.   I stamped the sitting girl with the Stayz matte black ink onto the photographic white card and coloured them with the alcohol markers.   These markers are so juicy and they have a smooth flow of colour that blends effortlessly - for a beginner in colouring every little bit helps.

Once the elements were prepared I cut down the white cardstock and added a top and bottom border trim of varying sizes of the coloured cardstock just to create a bit more interest.  Along the bottom right I used a script stamp and embossed it with white embossing powder.  I cut a 4" x 6" white cardbase  and then another slightly bigger in a contrasting colour.  These were mounted onto cardboard before glueing them onto the layout.   Once the photo mount was in place I randomly splashed the alcohol inks around it on the white cardstock.

The sitting girl was backed with cardboard and placed into position first then all the rest were layered and glued/foam taped where ever it looked the right place to be. Once all the pieces were prepared, it was just a matter of mounting and gluing them in place.  Glitter glue and resin bubbles where added randomly to finish the project. 


Couture Creations Products used:-

ULT200001     Cardstock - Snow White
ULT200009     Cardstock - Endless Dusk
ULT200082     Cardstock - Pandora
ULT200084     Cardstock - Divine
CO727166     Glitter Card - Silver
CO727181     Photographic Alpine White Smooth card 
CO728360     Ephemera Pack
CO728366     Stamp set - You Go Girl - Sitting Pretty
CO728375     Die - You Go Girl - Floral Corner
CO728095     Stayz Alcohol Ink - Matte Jet Black
CO728179     Stayz Alcohol Ink - Burgundy
CO727305     Alcohol Ink - Coral
CO727325     Alcohol Ink - Rasberry
CO727328     Alcohol Ink - Salmon
COA134         Alcohol Marker - Middle Yellow
COAP155      Alcohol Marker - Light Skin Color
COAP489      Alcohol Marker - Skin Color
COAP656      Alcohol Marker - Jasper
COAP917      Alcohol Marker - Baby Yellow
COAP921      Alcohol Marker - Crape Myrtle
COAP2065    Alcohol Marker - Wisteria
COAP2288    Alcohol Marker - Tender Pear
COAP5305    Alcohol Marker - Greek White
COAP7502    Alcohol Marker - Khaki Grey
COAP9544    Alcohol Marker - Leaf White
CO728096     Clear Casting Resin
CO726327     Glue - White Tacky
CO724824     GoCut and Emboss die cutting machine
CO727381     Precision Stamp Press
CO728278     Embossing Ink Pad
CO724963     Embossing Powder - Glacier White


Other Products:-
Silver ribbon, cardboard and glitter.


Thanks for stopping by ...


You can see me over on my personal blog here:-


Monday, 14 June 2021

Resin Tag

 Seaside Hanging Tag


Hello everyone,  I have just discovered the world of 'Resin Art'.  So I had a hunt for some moulds I could try that fitted in with the Seaside Girl Collection.  This is what developed.


Firstly I got curious - what would this resin work in, so I just made up a cupful and gathered a variety of mould types.  


I tried it in silicone and clear soft moulds, plastic dish and a sticky tape backed/acetate frame free form.  They all worked, some just removed easier.


My first batch I just used the clear resin.  Once it was cured I coated them with gesso thinking it would paint easier - I found that the wet ink was lifting the gesso in places. So, next I tried colouring the resin by adding a coloured alcohol ink (white).  This worked better with the painting - so now I know.


I cut a piece of cardboard 4" x 5" and sealed it with a coating of gesso on both sides.


I sealed the paper as well (next time I would use a matte) then glued it onto the backing board with glue.


I painted more moulds than I needed with the alcohol inks.  I used a few coats of different colours and the inks blended well onto the resin.


The components I used for this project.  Once I got this far it was just a matter of gluing it all together.  I added some art stones and modelling paste to finish it off.


The finished project.   
With the resin pieces, I thought that this idea of a 'hanging tag' could be a nice gift.


Couture Creations Products used:-


CO728096     Clear Casting Resin
CO728309     Seaside Girl - 6.5" Paper Collection, Page 1B & 3A
CO728317     Seaside Girl - Ephemera Pack
CO726327     Glue - White Tacky
CO726328     Glue - Liquid Scrap Spots
CO727301     Alcohol Ink - Botanical
CO727307     Alcohol Ink - Dandelion
CO727309     Alcohol Ink - Eggplant
CO727310     Alcohol Ink - Espresso
CO727332     Alcohol Ink - Snow Cap
CO727333     Alcohol Ink - Stream
CDEIPLU032   Dye Ink - Cappuccino
CO727948     Blending Brush - Medium
CO724871     White Gesso


Other Products:-
   Moulds,  Muslin/cheesecloth,  hession, ribbon, string, artsy stones,  4" x 5" cardboard base, a paper sealer like Mod Podge mat medium, modelling paste, .


To find a store near you that stock these Couture Creations products, click on the following link:- 


My Blog link is:-


Thanks for joining me...