Special Thanks Window Card

Welcome again! I can't keep away from glitter elements, this time using the beautiful purple glitter card. These stamps and dies are from the new collection You Go Girl designed by Lucy Campeanu.
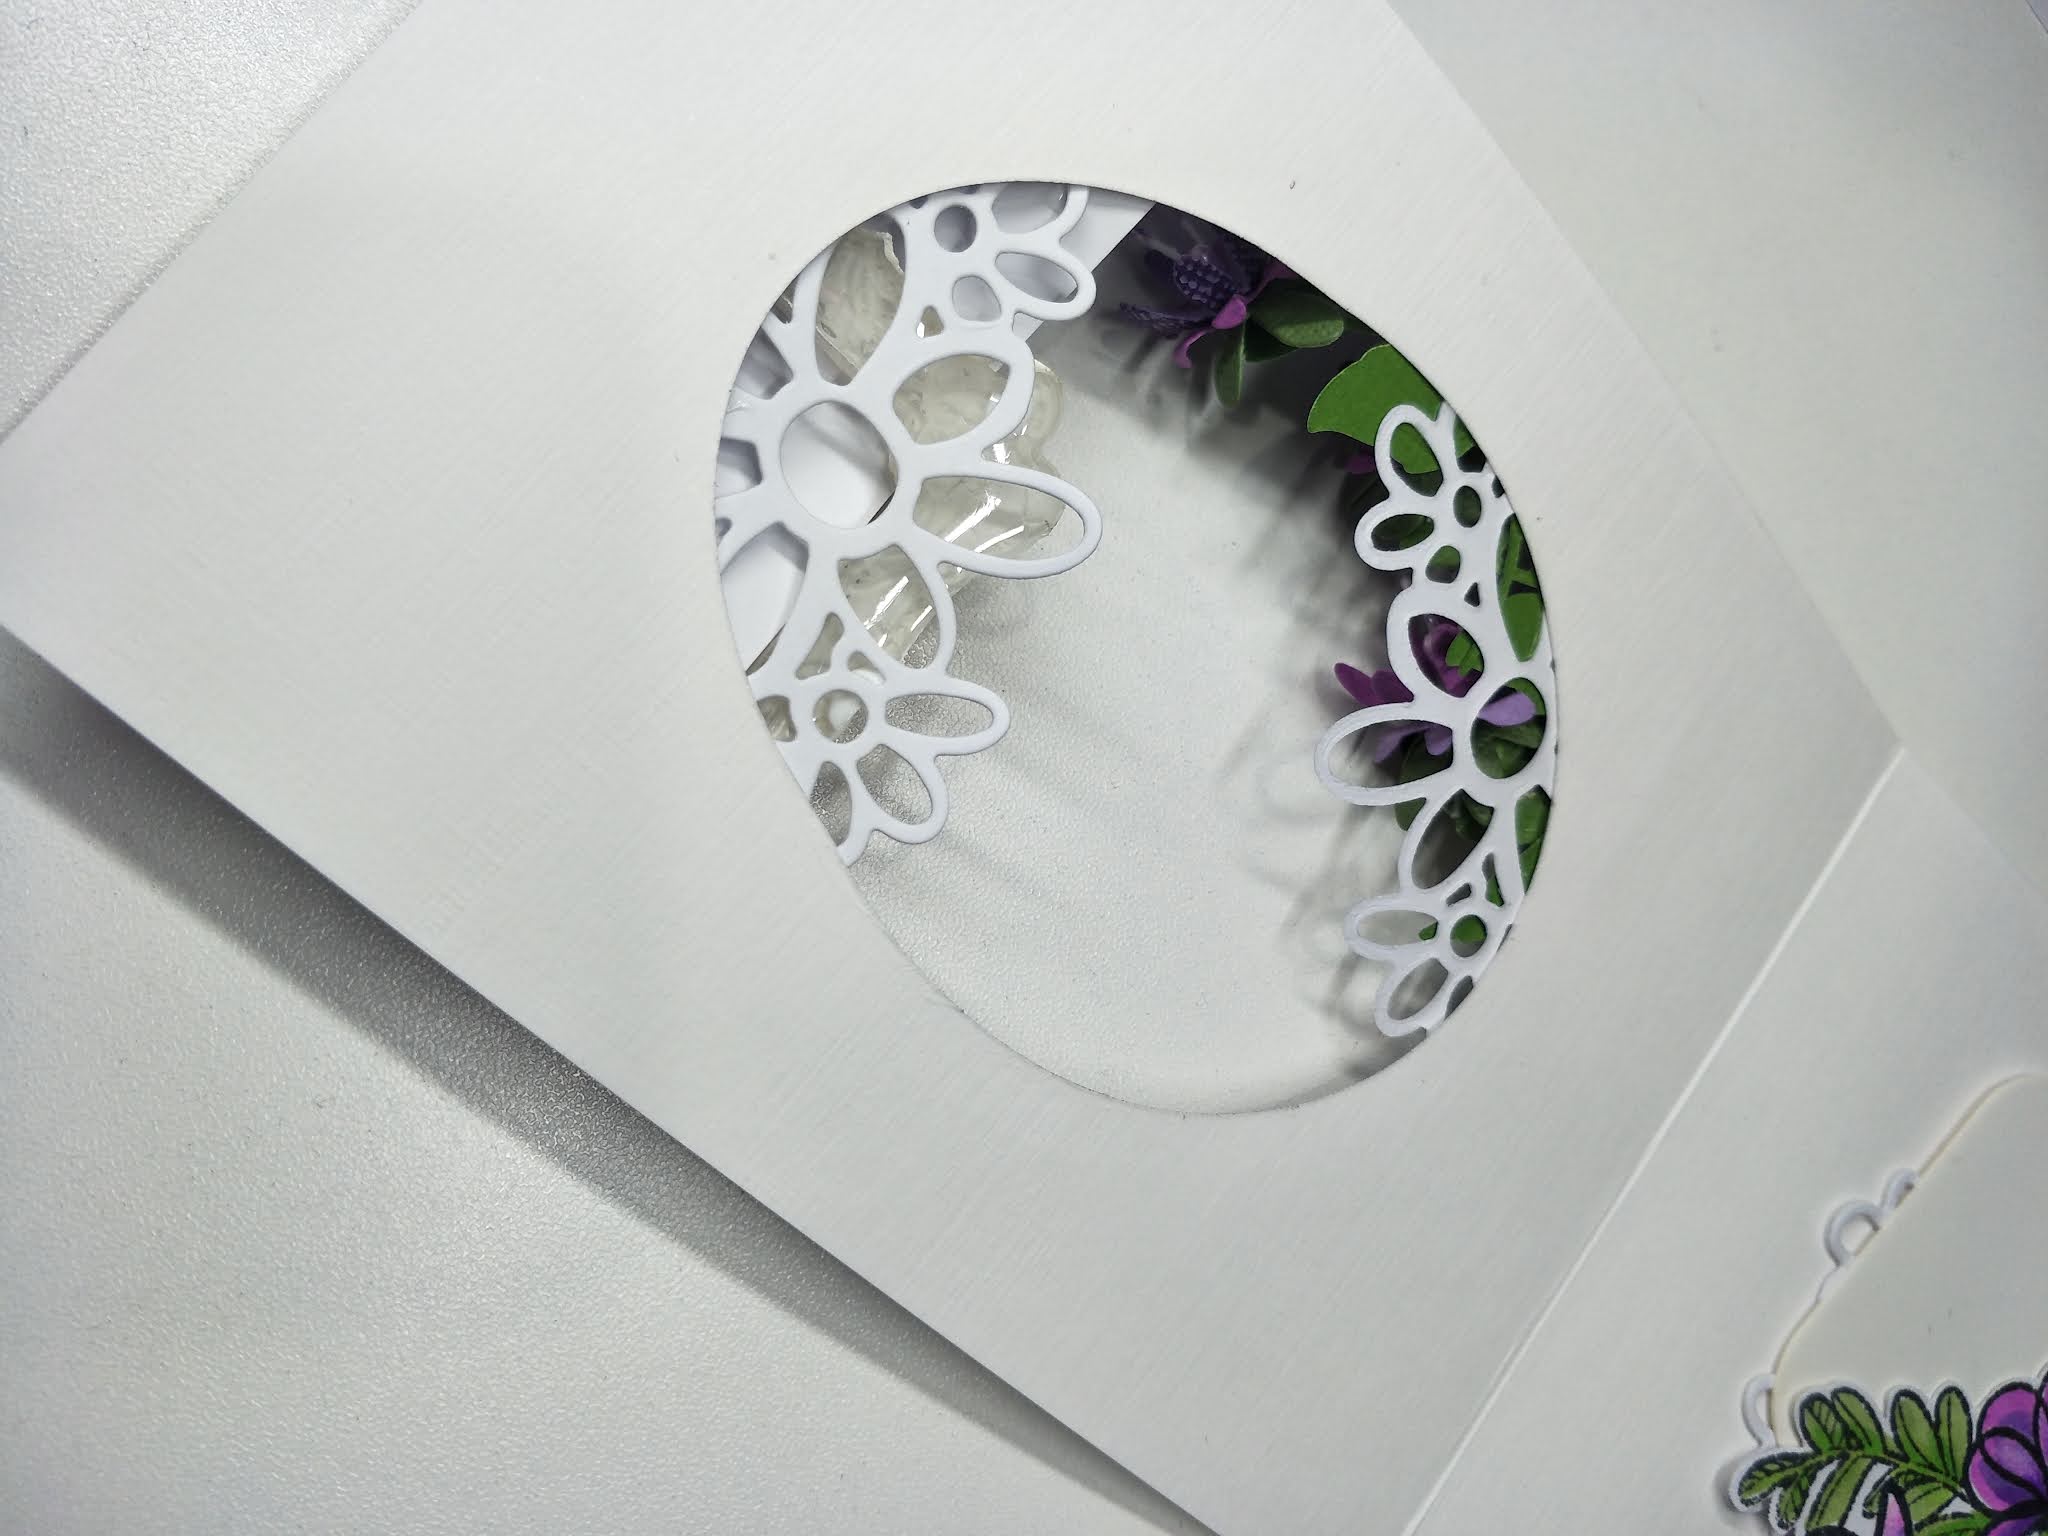
The day before I had to make a resin frame and allow it to set before I could make this card. I started by preparing all the required elements ( I never know how many I really need so I just make a few extra). I stamped and die-cut the leaves, flowers, dragonfly and corner flower pieces.
With the oval dies, I used the larger one to cut the purple glitter card first then positioned it over the front of the card base. I then aligned the smaller die inside this to cut the card front.
I made 3 'fuschia' flowers. I used the ball tool to shape the petals. I glued the bottom petals face downward and the top petals and sepal upwards. I pieced a hole through the centres and glued the stamens in there.
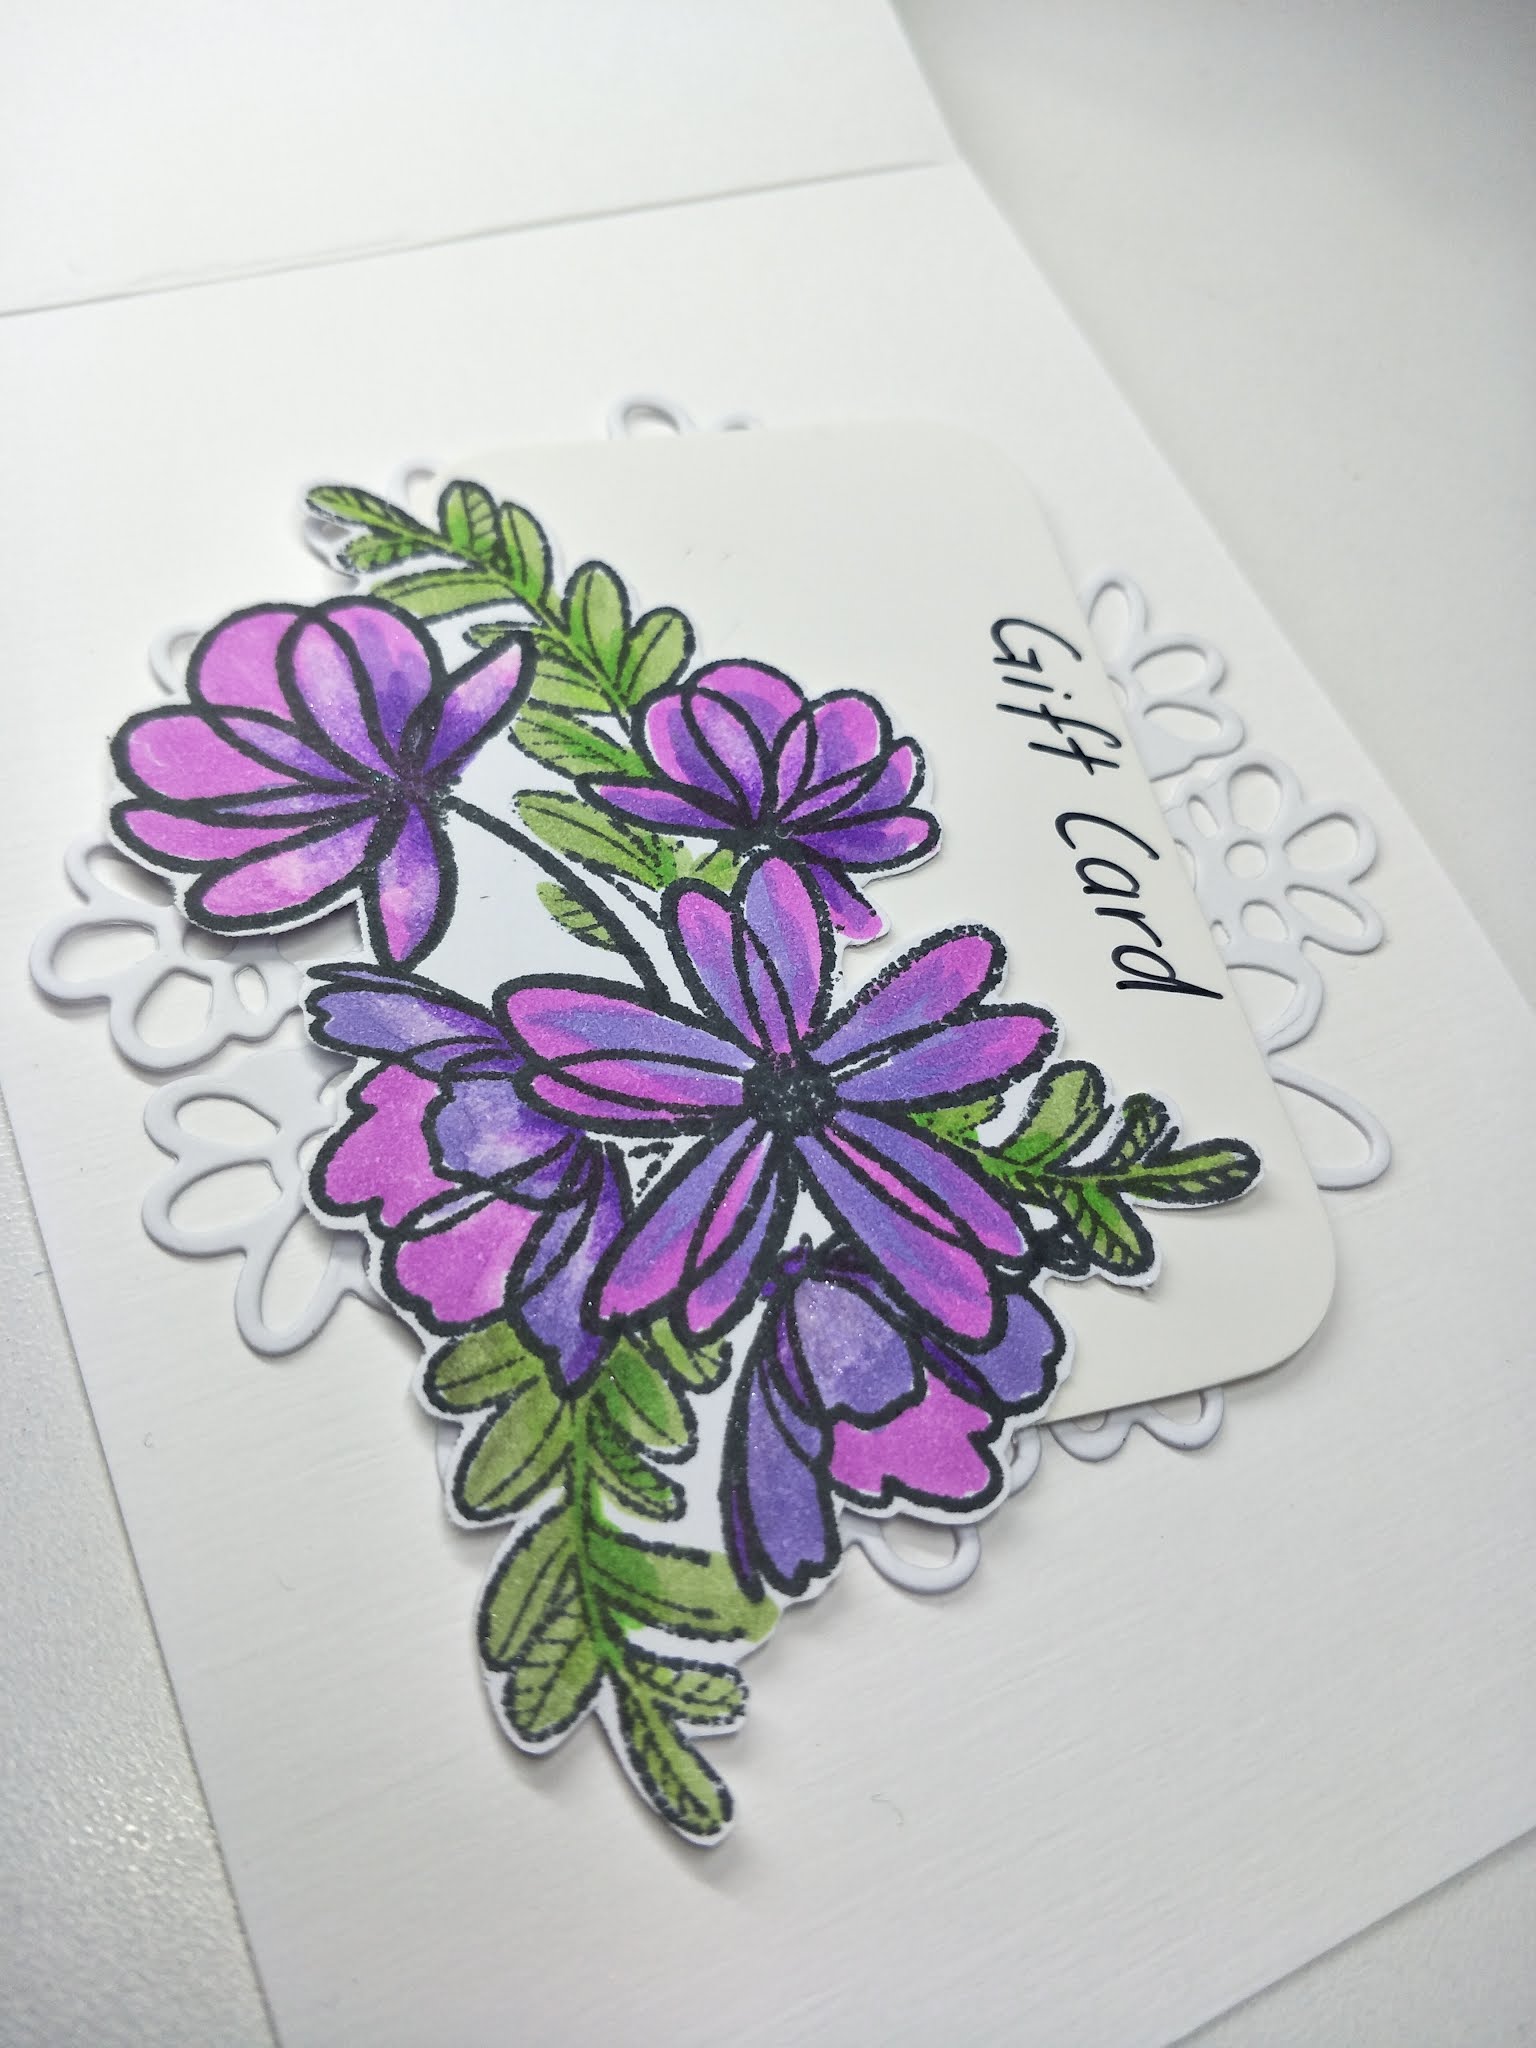
I embossed a sentiment onto white card then sized it down to fit inside the resin frame and cut a 'v' at one end.
I created a floral arrangement with the stamps by masking and layering - remember the image that you want in the front has to be the first image stamped then masked. I stamped the flowers with the black outline ink onto the photographic white card and coloured them with the alcohol ink markers. I love how the colourless blender changes the colours slightly and gives you a bigger range of colours. Once it was coloured, I fussy cut it out and put foam squares on one side underneath.
It was time to assemble all of this. Between the card front and purple glitter card I placed a corner flower die on alternative sides of the oval area then glued them in place. Everything else was glued into position as per the photos. Inside the card I created a spot for a 'Gift Card' to go as a special option.


CO723893 A6 White Card
ULT200038 Cardstock - Jungle
ULT200084 Cardstock - Devine
ULT200086 Cardstock - Royal Midnight
CO724977 Embossing Powder - Amethyst Metallic Finish
CO727169 Glitter Card - Purple
CO727177 Glitter Card - White
CO727181 Photographic Alpine White Smooth card
CO728361 Stamp Set - You Go Girl - Layered Florals
CO728368 Stamp Set - You Go Girl - Sentiments
CO728375 Die - You Go Girl - Floral Corner
CO728378 Die - You Go Girl - Princess
CO728380 Stamp & Die - You Go Girl - Flexing Branch
CO728384 Stamp & Die - You Go Girl - Layered Dragonfly
CO728475 Outline Ink Pad - Black
COAP0 Alcohol Marker - Colourless Blender
COAP2288 Alcohol Marker - Tender Pear
COAP354 Alcohol Marker - Pale Green
COAP7493 Alcohol Marker - White Lotus Leaf
COAP2065 Alcohol Marker - Wisteria
COAP271 Alcohol Marker - Lavender
COAP2715 Alcohol Marker - Hydrangea
CO728096 Clear Casting Resin
CO726327 Glue - White Tacky
CO724824 GoCut and Emboss die cutting machine
CO728285 Scoring & Modelling Set
CO728386 Stamping & Pricking Mat
CO727381 Precision Stamp Press
Other Products:-
Silicone mould for frame, adhesive gemstone, glitter pen, Gesso or white paint, Stamens and Gift Card.
Thanks for stopping by ...
You can see me over on my personal blog here:-
https://cardcraftkaylee.blogspot.com


