 |
| My Finished - Australia Warratah Stamp Card
Card Size - 10.5 cm x 14.8 cm (1/4 of an A4 Sheet)
|
Hello Everyone,
Welcome to my next project for Couture Creations using the lovely Sunburnt Country Collection We have some wonderful native flowers and foliage in our country, it's great to be able to showcase them. Hope there is something that interests you with this card.
 |
| 1. All the elements prepared and ready for assembly. The Firefly cardstock was trimmed, embossed with the Gumnut embossing folder before the edges where inked and distressed. The other papers were trimmed to size, inked with Pale Brown and distressed. The stamp was stamped with Pale Brown ink and painted with pink and green inks listed below. The Die-cuts were all cut out and inked randomly with a touch of Cappuccino ink. |
 |
| 2. Add double-sided tape to the backs of all cardboard and paper pieces |
 |
| 3. I used the Pearlescent inks as highlights on the tips of the petals and down the centre of the leaves. Around the outside of the warratah flower I smudged the Platinum white to try to give a bit of depth to the image. |
 |
| 4. Adding cardboard as backing on the mats gives you plenty of space to add trimmings of lace, muslin and foliage. |
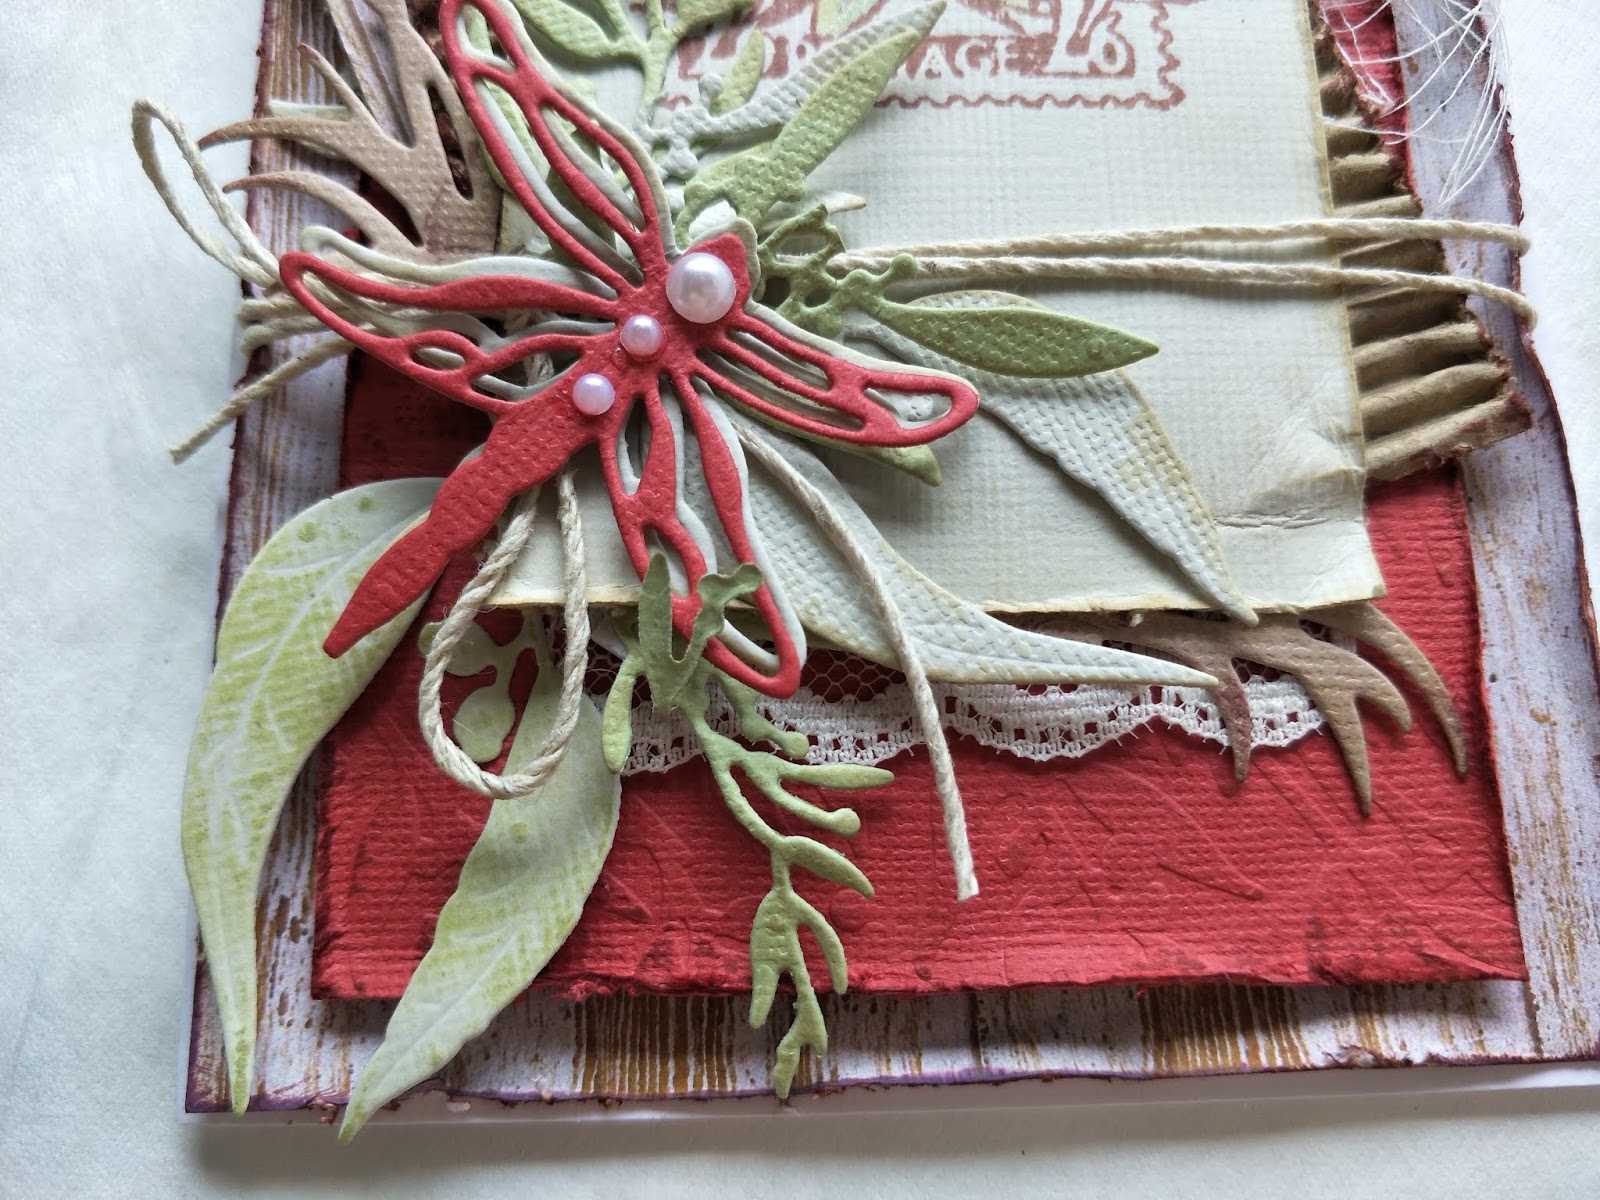 |
| 5. I offset the 2 dragonfly die-cuts to make it appear 3D. I added a hint of lace between the layers at the bottom, and a touch of muslin between the layers at the top. The adhesive pearls on the dragonfly and at the right of the stamp just felt right to put there. The string was wrapped around all the mats, a bow was tied then it was all adhered to the card front. |
 |
| The Finished Card |
Couture Creations Products used:

ULT157474 Mini Die - Small Grass Tree Tag
CO727220 Mini Die - Gumnuts
CO727221 Mini Die - Eucalyptus Branch
CO727225 Mini Die - Dragonfly
CO727227 Mini Die - Acacia Branch
ULT200002 - Cardstock - Delicate Medlar
ULT200024 - Cardstock - Verde
ULT200045 - Cardstock - Paper Bag
ULT200065 - Cardstock - Firefly
CDEIPL008 - Pigment Ink - Pearlescent Pearl White
CDEIPL018 - Pigment Ink Pearlescent - Olive Green
CDEIPL027 - Pigment Ink Pearlescent - Platinum White
CDEIPL027 - Pigment Ink Pearlescent - Platinum White
CDEIPU008 - Dye Ink - Bright Pink
CDEIPU009 - Dye Ink - Candy Pink
CDEIPU024 - Dye Ink - Olive Green
CDEIPU032 - Dye Ink - Cappuccino
CDEIPU033 - Dye Ink - Pale Brown
Other products used:
White card, Cardboard, Muslin, String, Adhesive Pearls, Lace trim, Water brush, Double-sided tape & glue.
White card, Cardboard, Muslin, String, Adhesive Pearls, Lace trim, Water brush, Double-sided tape & glue.
To find a store near you that stock these Couture Creations products, click on the following link:- https://couturecreations.com.au/pages/store-locator
My Blog Link is: Card Craft Kaylee . blogger.com
Thanks for joining me...


