Hello Friend
Blooming Friendship Folio
Welcome to my next project for Couture Creations using the
'Blooming Friendship' Collection.
This collection has delicate blues and rich deep red florals with accents of green and brown. I thought I would try to make something with the 'postcards', I think this is called a folio.
I started with the 'postcards', added a page from the '12" collection pad' and some of the 'stickers'. I selected a complementing sheet of cardstock and let it evolve.
I cut the cardstock along the 6" mark, scored and folded along these lines. I trimmed down the 'designer sheet' to fit my card base. All the edges were ripped, inked and sewn to the cardbase. I backed the 'sticker' elements with card then inked their edges as well. From the cardstock I die-cut the 'leaves', '2 ladies chatting' and the 'tags'.
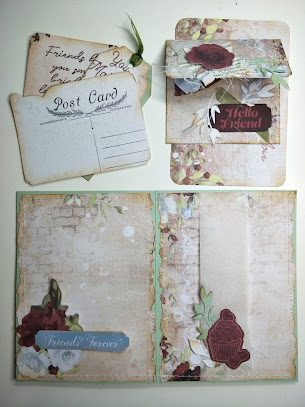
This is the layout of the back (left) and front (right) pages with the elements that were added to them.
On the front page I created a double-sided paperclip arrangement with various elements of bits and bobs, all glued together. This just slid onto the folded back edge. I selected one of the 'framed quotes' from the collection and slid it in at the top.
This is the layout of the centre spread with the elements that were added to them. On the left page, I glued the backed sticker only on the left and bottom side so it created a tuck spot for the postcards and tag.
On the right page, I folded a belly band made with baking paper under the designer paper before sewing them to the card base, then glued a few elements at the bottom. I then created a small envelope that held the small tag, the wine glass and chocolate stickers that I backed with cardstock. I added a bit of interest to the edge of the postcard with some muslin and die-cut leaves.
These photos show the centre spread loaded up. I ended up adding a small acetate flip window to the right page, adding some muslin, a button and string tie. With the cut-out piece of cardstock I used it as a base for a circle tag and topped it with a circle of designer paper.
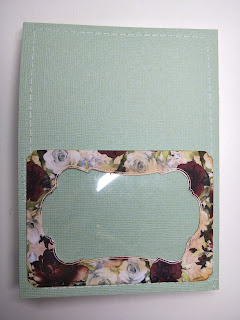
On the back page, I used the frame from the cut-out-tag, backed it with acetate, inked the edges, glued it on 3 sides and placed it into position forming a pocket. This pocket holds 2 postcards.

The finished project.
Couture Creations Products used:-
CO728099 Blooming Friendship - Paper Collection, Page 4A&B,5A, - Post Cards & Stickers
CO728117 Blooming Friendship - Die - Coffee Break
CO728118 Blooming Friendship - Die - Friendly Branches
CO727712 Steampunk Dreams - Die - Distressed Tags CO727713 Steampunk Dreams - Die - Straight Edge Tags
Other Products:-
Corner Punch, Circle punch, Edge Punch, Acetate, Ribbon, string, muslin, Button, bead charm, paper clip, baking paper strip and glue.
To find a store near you that stock these Couture Creations products, click on the following link:-
Here is a quick Video of a walk-through of the folio:-
My Blog link is:-
Thanks for joining me...


